
Height off the ground isn’t the only attribute that’s important when hitting the ball with a so-called ‘good’ or ‘appropriate’ impact point. As Lewit (2014) put it - you need appropriate ‘distance’ from the ball too.
First, the horizontal (front & back) and lateral (side to side) distances of the ball relative to your body are also important contributors to timing and swing mechanics.
Specifically, all elite players make contact with the ball somewhere in front of their body - not too far in front where they feel like they’re reaching and definitely not too far back (which wouldn’t allow their body to rotate freely into the strike). In terms of lateral distance, if the ball is too close, you’ll feel jammed and if it’s too far, you’ll be reaching.
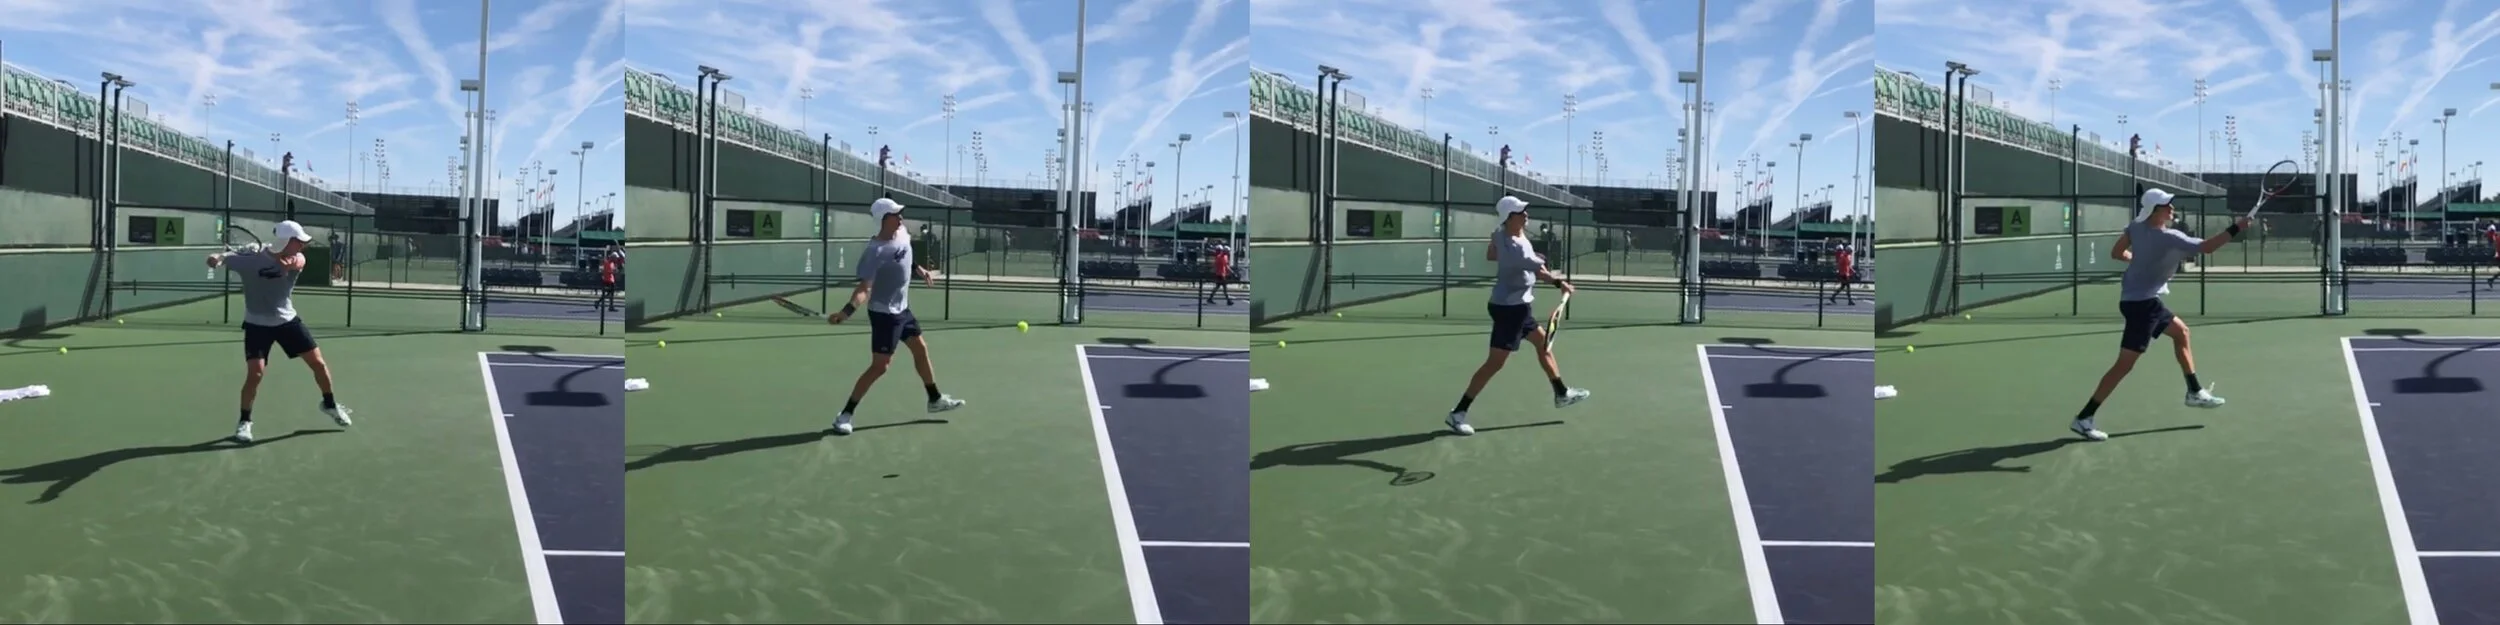
ATP player Marc Polmans hitting a rally forehand. Notice the impact in front.
There is no exact ‘ideal’ position as every player has variations in mechanics, limb lengths and ways in which they produce power. On top of that, every groundstroke, as we’ll see below, has a slightly different impact point - the lateral distance changes when the ball is above and below the waist.
All in all, it’s key to feel like you can swing freely while making contact at the appropriate height. We will outline a drill below that will help accomplish this.
The second factor that we must consider is the following - what is the ball doing when we make contact with it? While this module isn’t about strategy and tactics, we must consider that every shot in tennis has a tactical base. So what the ball is doing at impact (or what we ‘let’ it do), will have an impact on the decision tactically. Let’s explore.
There are 3 possibilities:
1 - The ball is rising
When we take the ball ‘on the rise’, the ball is still traveling upwards after the bounce. Usually, the tactical goal here is to take the ball early and take time away from our opponent. This occurs in baseline exchanges but can also happen on return of serves (particularly on 2nd serves where the ball is ‘jumping’ up) and even at net (think half volleys). Players who struggle with timing will struggle when aiming to hit ‘on the rise’.

Also, look at the image above. Here, Marc Polmans is not only hitting the ball on the rise, he’s making contact at shoulder height (more or less). If he were to move back, he would buy lots of time for his opponent - and he might provide them with an advantage as well. At this shoulder height impact, he can also be a little more aggressive (he’s a pro and is standing behind the baseline…for most of us, however, we probably want to be inside the court when hitting the ball at shoulder height).
But overall, shoulder height is the correct impact when we are trying to ‘drive’ the ball (i.e. level it out). More on that in the ‘take action’ section below.
2 - The ball is dropping
Here, we are trying to buy time. Often, this occurs when we want time to have a bigger swing (which sometimes, can be effective) - like if you’re playing on clay. On clay (or a slow, grippy hard court), many players prefer to play with more height and spin. So many will move quite far behind the baseline in order to hit the ball as it’s coming down, using a larger swing with steeper than normal swing path - which creates a tremendous amount of rotation. Tactically, this can be difficult for players who don’t like to hit the ball at that height.
One factor to note here, we don’t want the ball to fall too low - if we do let it fall below our waist (and close to the ground), it’ll be difficult for us to hit a high quality shot. When it comes to rally and attacking situations in today’s game, very rarely do elite players let the ball drop (unless there is a specific tactical reason). When we let the ball drop, we also allow our opponent more time to recover and thus more time to be ready for the oncoming shot.
Notice how I am waiting til the last second (once I see my player move to one corner), prior to hitting. I’m intentionally letting the ball ‘drop’.
Perhaps the only time we want the ball to fall a little more than normal is during a disguise situation - i.e. we are holding the ball on the strings a little longer than normal.
3 - The ball is at its peak
There’s an instant in time where the ball is completely still; it is no longer rising and has yet to begin to drop (we call this the peak).
Hitting on the rise can be challenging - especially when the ball has either lots of spin, is hit with lots of pace, is very deep in the court (or a combination of these characteristics). This is why you’ll see many elite players hitting the ball at the peak of the bounce - and why this is something that must be practiced as it requires a player to a) read the ball very well and b) to get into position faster.
Take Action
Impact Point Drill - ‘Up’ or ‘Back’ (Peak)
Similar to the impact point drill from the previous lesson, on every ball you will make a decision as to whether you must move ‘UP’ or ‘BACK’ to make contact with the ball at the appropriate height. The only difference is that the aim is to make contact with the ball as often as possible, at the peak of the bounce and the word ‘stay’ is not an option here. In other words, even if you have to take a half-step forward or backward, you must call ‘up’ or ‘back’.
Instructions:
Call out ‘UP’ or ‘BACK’ as soon as you know which decision is best given the oncoming shot. Move into the appropriate position and do your best to meet the ball at the peak of the bounce.
There are 2 cases where hitting at the peak of the bounce will be very difficult:
If the ball flight is very high but the ball is not hit with lots of pace (whether deep or short doesn’t matter), the bounce will also be high (perhaps even above your head). In this case, you will not have a chance to make contact at the peak; therefore, you will take the ball on the rise and make contact with it around chest/shoulder height.
If the ball is hit high but very deep and/or with good pace and lots of topspin, the bounce will also be very high. In these cases, it might be more difficult to take the ball on the rise. That said, you can still either a) take it on the rise OR b) move back, let the ball drop and make contact around waist height.
Advanced Variation - Yes/No Impact
This drill can be progressed by saying ‘YES’ or ‘NO’, depending on if you made contact at the appropriate height, and with the appropriate condition. If you’re tough on yourself, a ‘YES’ response would have to satisfy the following:
The ball is hit at the peak of the bounce the majority of the time (except in special conditions). You can add a goal - 3 sets of 5 ‘YES’ responses in a row - for example.
If you don’t have enough space to work with (perhaps you’re playing indoor tennis or there’s not much space between the baseline and the fence), take the ball on the rise and make contact around chest height. Here’s another image of Novak executing this to perfection.
Drill - Shape or Drive
Instructions found in the video itself.
With this drill, you’re learning to:
Distinguish between a ball that needs to be hit at shoulder height vs waist height.
Level off shoulder height balls (i.e. drive them).
Vary the trajectory of the ball - and to go from shape to flat and back etc.